Do you believe in government "by the people, for the people, and …
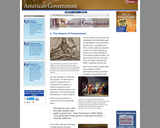
Do you believe in government "by the people, for the people, and of the people"? Few Americans would say no, especially since these words spoken by Abraham Lincoln in his 1863 Gettysburg Address are firmly imbedded in the American political system. Yet governments over the centuries have not always accepted this belief in popularly elected rule.
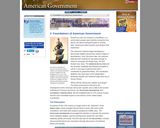
Why do governments exist? One major reason is that they create rules. …
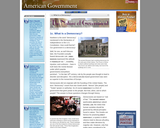
Why do governments exist? One major reason is that they create rules. But what rules are necessary or desirable? That is open to question, and different types of governments have certainly created a wide variety of rules.
Democracies are based on "rule of law." The ancient Greeks (particularly Aristotle) …
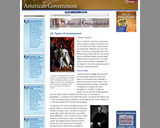
Democracies are based on "rule of law." The ancient Greeks (particularly Aristotle) valued natural law, the notion that human societies should be governed by ethical principles found in nature.
Liberty and equality. These words represent basic values of democratic political systems, …
Liberty and equality. These words represent basic values of democratic political systems, including that of the United States. Rule by absolute monarchs and emperors has often brought peace and order, but at the cost of personal freedoms. Democratic values support the belief that an orderly society can exist in which freedom is preserved. But order and freedom must be balanced.
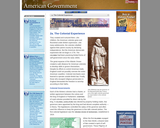
The American colonies began developing a democratic tradition during their earliest stages …
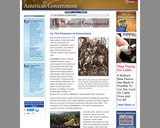
The American colonies began developing a democratic tradition during their earliest stages of development. Over 150 years later, the colonists believed their experience was great enough to refuse to recognize the British king. The first decade was rocky. The American Revolution and the domestic instability that followed prompted a call for a new type of government with a constitution to guarantee liberty. The constitution drafted in the early days of the independent American republic has endured longer than any in human history.
The great expanse of the Atlantic Ocean created a safe distance for …
The great expanse of the Atlantic Ocean created a safe distance for American colonists to develop skills to govern themselves. Despite its efforts to control American trade, England could not possibly oversee the entire American coastline. Colonial merchants soon learned to operate outside British law. Finally, those who escaped religious persecution in England demanded the freedom to worship according to their faiths.
So the freedom that the American Revolution sought to preserve proved to …
So the freedom that the American Revolution sought to preserve proved to create a government under the Articles of Confederation that could not keep law and order. But the failure of the initial experiment helped the founders to find a more perfect balance between liberty and order in the Constitution they produced in 1787.
Most of the delegates at the Constitutional Convention had already risked being …
Most of the delegates at the Constitutional Convention had already risked being hanged as traitors by the British. No wonder that they worried about their states' reactions to their decision to abandon the Articles of Confederation and create a whole new document.
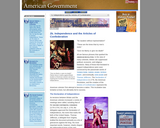
States cherished their new freedom from British control, and ratification of the …
States cherished their new freedom from British control, and ratification of the Constitution by state legislatures was by no means certain. All thirteen states finally ratified by 1790, but only with the addition of ten amendments, known as the Bill of Rights, that guaranteed citizens' rights and freedoms.
Did you ever wonder why you don't need a passport to go …
Did you ever wonder why you don't need a passport to go from New York to California, but if you were to move from one state to another, you would need a new driver's license? Or why you can use the same currency in all states, but not be subject to the same speed limits? Or why you have to pay both federal and state taxes?
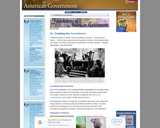
The founders very carefully divided powers between federal and state governments. They …
The founders very carefully divided powers between federal and state governments. They were responding to both the colonial aversion to the tyranny of King George III as well as the failure of the Articles of Confederation. Their careful separating and blending of state and national powers guarded against tyranny, allowed for more citizen participation in government, and provided a mechanism for incorporating new policies and programs.
Some issues have endured throughout American history. What is meant by civil …
Some issues have endured throughout American history. What is meant by civil liberty? Does (or should) Congress truly represent the people? Do the courts ensure that justice prevails? How much power should lie with the President?
For almost 200 years, the federal-state relationship has shifted more and more …
For almost 200 years, the federal-state relationship has shifted more and more toward national supremacy. But some observers today believe that over the past twenty years, the balance of power is beginning to tilt back toward the states. Presidents Richard Nixon, Ronald Reagan, and George Bush tried to slow down the growth of the national government under the banner of "New Federalism."
Democracy, liberty, equality, and justice. These values are not very controversial. But …
Democracy, liberty, equality, and justice. These values are not very controversial. But Americans have vastly divergent viewpoints on the meanings of these core values. Does assisting the poor represent a movement toward equality, or does it create an unfair burden on the middle and upper classes? Does the permission of abortion defend the liberty of American women or endorse the ending of a human life? Do elected officials really represent the people, or are they just out for themselves? These issues and many more reflect a wide range of political attitudes that shape how Americans participate in government and politics.
Famous events from American history åÑ the movement West, the Civil War, …
Famous events from American history åÑ the movement West, the Civil War, the Industrial Revolution, involvement in World Wars I and II, the New Deal and the Great Society åÑ have been expressions of American political culture. Many events have questioned and answered various interpretations of American values and beliefs. But most of all, the political culture defines political attitudes, institutions, and activities that are most cherished in American political life.
Given the challenges of accurate polling of public opinion, it is amazing …
Given the challenges of accurate polling of public opinion, it is amazing that polls that follow the right steps almost always make the right predictions. They've come a long way since George Gallup helped his mother-in-law win her election in 1932.
People may participate in politics in many ways. They can write their …
People may participate in politics in many ways. They can write their Representative or Senator, or work in for a candidate or political party. They can make presentations to their local school board or city council, or call the police to complain about the neighbor's dog. Partly because of our federalist system, people have many opportunities to participate in our democracy on federal, state, and local levels. Some forms of participation are more common than others and some citizens participate more than others, but almost everyone has a voice in government.
Voting is at the heart of democracy. A vote sends a direct …
Voting is at the heart of democracy. A vote sends a direct message to the government about how a citizen wants to be governed. And yet, only 48.8 % of eligible voters actually cast their ballots in the 1996 presidential election. That figure represents the lowest general presidential election turnout since 1824. In off-year elections (those when the president is not running) the statistics are even worse. Why don't people vote?
No restrictions on your remixing, redistributing, or making derivative works. Give credit to the author, as required.
Your remixing, redistributing, or making derivatives works comes with some restrictions, including how it is shared.
Your redistributing comes with some restrictions. Do not remix or make derivative works.
Most restrictive license type. Prohibits most uses, sharing, and any changes.
Copyrighted materials, available under Fair Use and the TEACH Act for US-based educators, or other custom arrangements. Go to the resource provider to see their individual restrictions.